Thousands of dollars.
That’s how much we save at the grocery store each year thanks to growing and preserving our own healthy food.
And we want the same money-saving, health-promoting benefits for you!
We all remember what it was like being a beginner gardener. I grew up on a small farm with a huge vegetable garden that fed us all winter long. I learned a lot during those formative years, but I thought that the only way to kill the bugs that ate our plants was to use pesticides. Little did I know that when I returned to farm life in my 40s, I would learn how to grow all types of veggies and fruits WITHOUT pesticides by using beneficial insects, instead, to kill the harmful bugs—and all I had to do was grow certain flowers to attract these wonders of nature. Who knew?
(Our Gardening Without Pesticides e-book offers a beneficial insects guide & more! For less than $2, you can have a handy gardening guide to reference for all your planting adventures this spring.)
Whether you live in the suburbs or have your own plot of land, and whether you have gardened for years or this is your first time, growing your own healthy, pesticide-free food is not out of reach.
Keep reading below for 3 summer vegetables that are perfect for beginner gardeners!
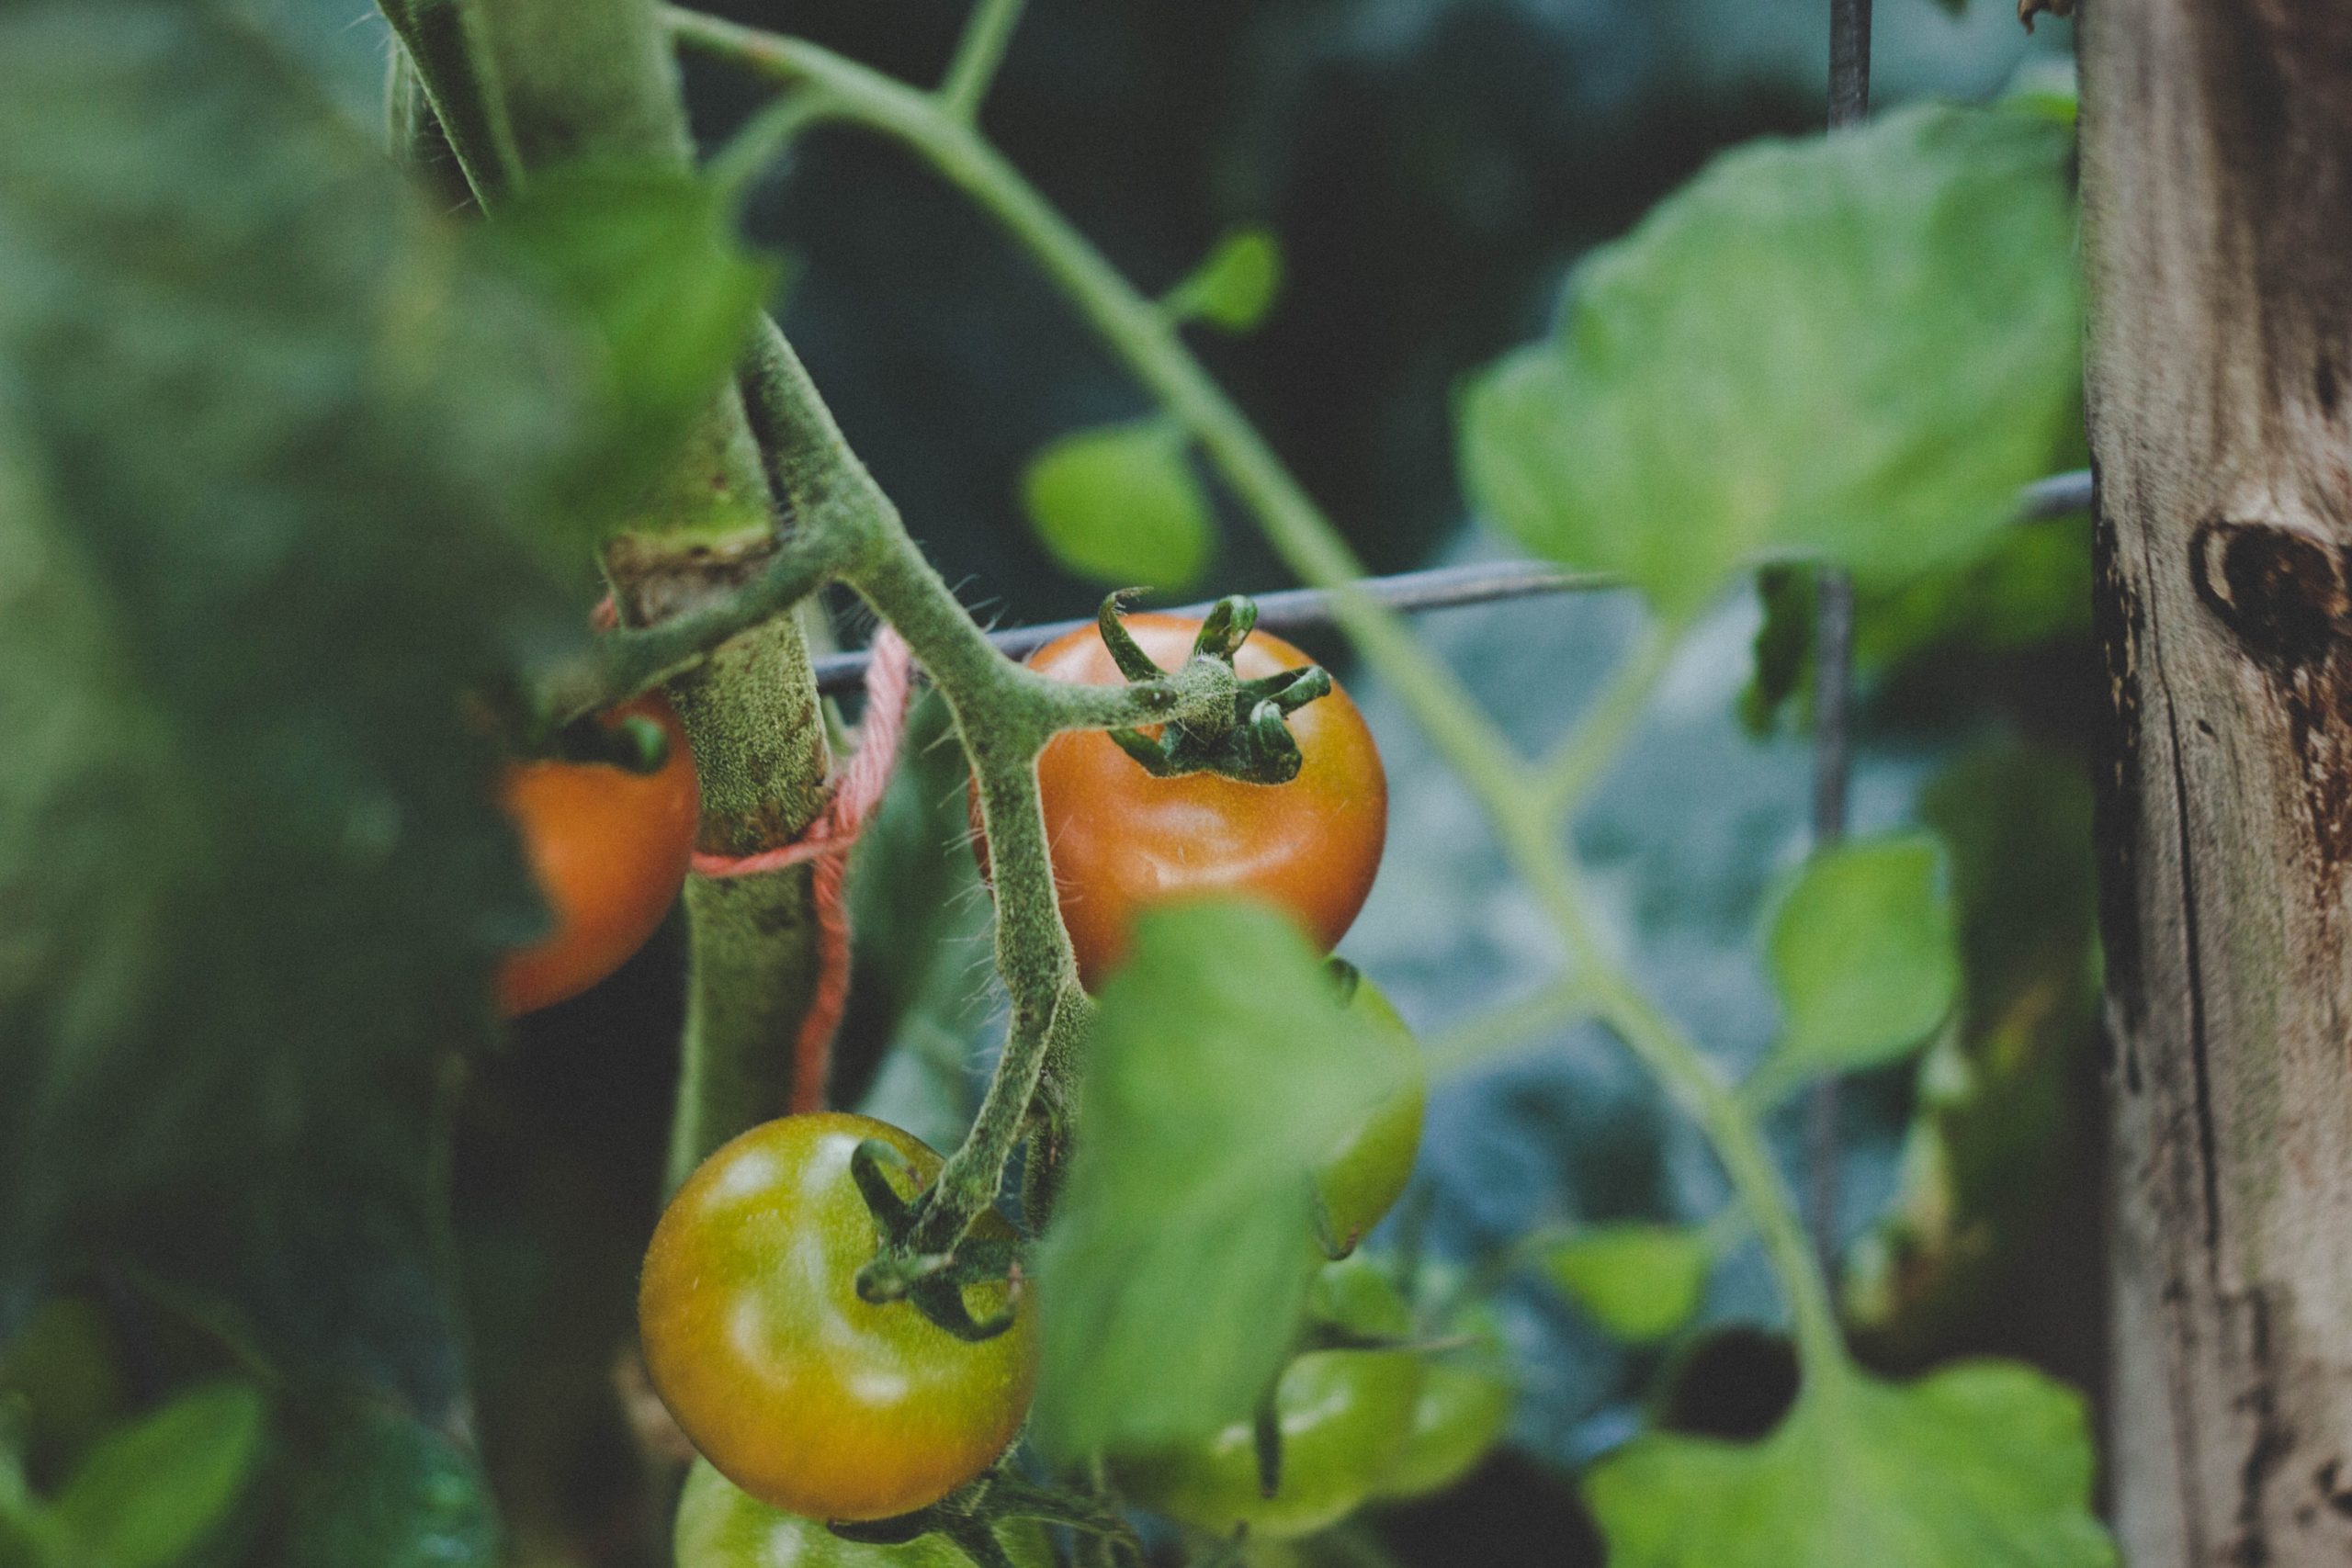
Tomatoes
Tomatoes might as well be the mascot of summer produce. Who doesn’t associate juicy red tomatoes with the long days of sunshine and summertime? Versatile in the kitchen and consistently producing fruit throughout the harvest season, tomatoes are a great veggie for the beginner gardener.
Even if you only have a full-sun patio, you can successfully grow some tomato varieties, like cherry tomatoes, in a pot! Tomatoes are truly the most accessible summer veggie.
Keep in mind these factors when growing tomatoes:
Soil Health
Soil provides the nutrients plants need to thrive. If your soil lacks proper nutrients, you’ll notice yellowing leaves in your tomato plants. But if you swing wildly the opposite direction and over-fertilize your soil, your tomato plants will go nuts producing foliage—but not enough fruit.
So yes, it’s a balance.
But it’s not something that a beginner can’t accomplish!
We always recommend testing your soil before planting. You can test your soil through your local Ag Extension. Once you have your results in, you’ll be able to amend your soil and create the perfect home-sweet-soil for your tomato plants. Learn how to test your soil here.
Space
No one likes being on an overcrowded elevator, and your tomato plants, in this metaphor, most certainly wouldn’t like it either. Tomatoes need space between each plant to allow for adequate airflow to keep the plants dry and prevent the development of fungus.
We plant our tomatoes 24 inches apart on all sides. Visualize a 2’x2’ “box” space around each tomato plant, and they will appreciate it!
Plant Support
Tomatoes can’t grow upright without support. By staking your tomatoes, you ensure the fruit remains off the ground.
There are two types of tomato plants: “determinate” and “indeterminate.” Determinate tomato plants will grow to a certain height, whereas the indeterminate plants will grow and grow and grow. Figuring out which type of tomato plant you are growing in order to determine which type of support will be needed.
Many people use wire cages to keep their plants erect and for a determinate plant, this will work. We personally use wooden stakes, since we’ve found that it does a better job at keeping the plants upright so they can produce the most fruit. We make sure to sanitize these stakes each year (as you should with any garden tool you use) to ensure no fungus remains between planting seasons. Additionally, be sure last year’s tomato plants don’t end up in the compost—leftover fungus can live in compost, too. The last thing you want is to kill off your new tomato plants because of last year’s leftover fungus.
When to Plant
Check your frost dates before planting; tomatoes are heat-seeking, sunshine-loving plants that will not tolerate frosts. Only plant after the last frost date has passed. For the Middle Tennessee area the timing is around April 15th. Check your zone’s frost dates here.
Because of the long growing season prior to fruit production (it’s about 60 – 100 days to harvest, depending on where you live), most people start their tomato seeds indoors and then transplant to their outdoor garden once the last frost has passed. If you want to skip this seed step, you can purchase young tomato plants from your local nursery.
When planting your tomatoes, place in a hole twice the size and depth of the root ball. This allows for a stronger root system and healthier plant.
We grow our tomatoes from seeds in our temporary greenhouse before transplanting them to our outdoor garden. Learn how to create your own temporary greenhouse here.
Protect from Pests & Diseases
Tomatoes are vulnerable to diseases like blossom end rot, southern blight, bacterial spot and more. However, you can organically prevent and treat these diseases! Many tomato varieties are now created to be disease-resistant, as well.
Additionally, pests love tomatoes, especially every gardener’s arch nemesis, the aphid. The good news is that you can keep these pests at bay—without using chemical pesticides. As I mentioned earlier, the key is planting flowers that will attract beneficial insects (a.k.a. insects that prey on the pests) to your garden.
You can read up more on tomato pest & disease prevention in the following blog posts:
- 11 Common Tomato Diseases: How to Organically Prevent & Treat for a Hardier Tomato Harvest
- 2 Pesky Tomato Viruses: How to Organically Prevent & Protect Your Tomato Plants
- Pesticide-Free Garden Protection: 12 Beneficial Insects to Control Pests
To learn more about growing tomatoes, check out The Old Farmer’s Almanac.
Summer Squash & Zucchini
So summery it’s got “summer” in its name!
Summer squash & zucchini are vegetables that a beginner gardener can easily master the art of growing. And once you do master it, you’ll have an abundance of squash waiting for your pickin’. In fact, during peak growing season, each plant will produce multiple squash—per day! You’ll have a whole lotta squash on your hands come harvest time. And when you do, you can try out some of these mouthwatering squash & zucchini recipes. Zucchini can also be preserved for enjoying later in the year, too!
Here are a few things to keep in mind when growing squash:
Summer & Winter Varieties
Different squash varieties can be grown at different times of the year. For your summer growing purposes, you’ll want to choose crookneck squash, yellow squash/straightneck squash, and zucchini varieties.
Soil Health
Not to repeat ourselves but yep, you should test your soil no matter what veggies you’re planting for the season, squash included.
Squash are hungry plants that need lots of nutrients to pull from. Add compost or manure to your soil before planting.
When to Plant
Squash seeds can be sown directly into the soil OR grown indoors/in a temporary greenhouse before transplanting. If planting your seeds into the ground, wait until at least a week after your last frost date. Squash prefer warm soil that’s at least 60ºF at planting depth. We generally plant our summer squash and zucchini between April 15th and May 1st to ensure proper soil temperature and germination. Squash generally take between 45 – 60 days from seed to harvest.
Read more about growing summer squash & zucchini from The Old Farmer’s Almanac.
Bell peppers
Buying a bell pepper at the grocery store can cost anywhere from $1 – 1.50—each. Sure, you could keep spending your dollars on grocery-grown bell peppers, or you can opt to easily grow your own delicious, sweet bell peppers!
What makes bell peppers perfect for beginners is that peppers resist most pests, unlike some other veggie varieties.
Soil Health & Location
Peppers prefer soil that’s a bit more on the acidic side, in the 5.5 to 6.5 pH range.
Keep in mind… potatoes and peppers don’t play nice. Avoid planting the two in the same spot to keep the plants from passing diseases to one another.
On the other hand, peppers love to be planted with or around tomatoes as a companion plant. We plant all of our peppers (every variety) in a row between two rows of tomato plants and always have a great crop. We generally plant them 18 inches inches apart, but if you have more room, feel free to plant them 2 feet apart.
Be sure to plant the peppers in a hole twice the size and depth of the root ball. This planting practice for both tomatoes and peppers allows for a much stronger root system that will lead to heartier plants.
Like most summer veggies, bell peppers are all about that fun in the sun. Choose a spot that is free of shade so that your pepper plant is able to produce the juiciest, sweetest fruit.
Support
If your pepper plant is having trouble staying erect, you can offer your helping hands in the form of cages or stakes.
When to Plant
Like tomatoes, bell peppers have a longer growing period (60 – 90 days on average) and therefore it’s best to give the seeds a headstart by growing them indoors. You can also purchase young plants from your local nursery to transplant into your garden after the last frost.
Harvesting
Fun fact: the longer the fruit stays on the plant, the sweeter it becomes! Harvest your bell peppers when they’ve reached the desired color. If your heart is set on red bell peppers, keep in mind that the red color takes much longer to mature on the vine—which can make it susceptible to bug bites, fungus, or holes from hungry wildlife.
You may have heard that red and green bell peppers are the same variety, that the red bell peppers are simply more ripened green ones. Well, not always the case. Sure, red bell peppers do start out green before ripening to red, but there are also green bell pepper varieties that are simply that: green. This post provides clarification on the common question, are all peppers the same?
To read more about growing bell peppers, check out this guide.
***
KEEP SHARPENING YOUR GARDENING SKILLS:
To have a handy guide to reference all growing season long, check out our e-book—on sale for less than $2:
To learn more about seed varieties and where we source our own seeds, check out this blog post:
Rabbits and deer love our summer fruit as much as we do! Here’s how to keep them out of your garden: