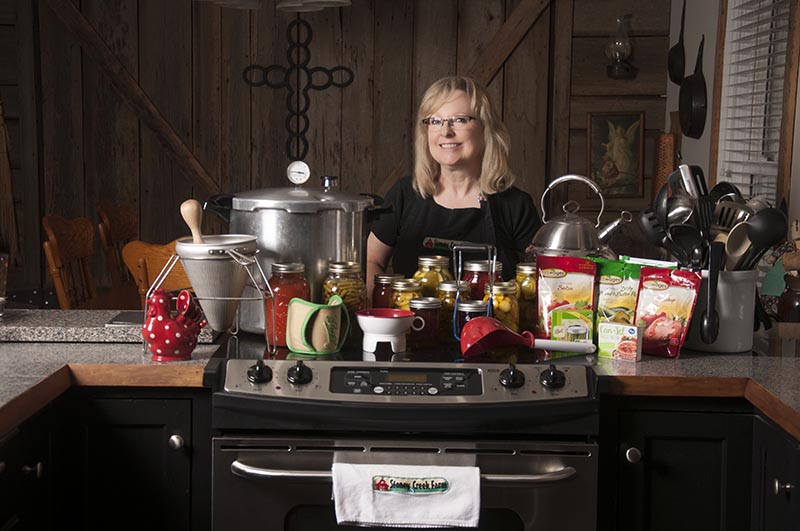
It’s the middle of winter here at Stoney Creek Farm, but my family is still enjoying the bounty from last summer’s garden harvest—and I always receive compliments from family or friends when I serve them recipes with my canned food items! In fact, I used my crushed tomatoes in homemade chili last Sunday. (The recipe is at the bottom of this post if you want to try it, but it’s the home canned tomatoes that make all the difference!)
How?
We preserve our own healthy food through canning!
But why should you go through the effort to preserve your own food in the first place?
Canning reduces food waste.
Americans waste 80 billion lbs of food per year. By canning your leftover produce, you ensure you don’t add to that shameful statistic.
Canning saves you money.
No need to purchase from the grocery store when you have a pantry full of preserved produce waiting for you! We’ve saved thousands of dollars over the years on our grocery bill by preserving our own food.
Canning lets you control the ingredients.
We preserve our food without the use of preservatives like msg, sulfites, and nitrates—so our canned food is healthier than some items from the grocery store.
This includes pesticides, too. At Stoney Creek Farm, we grow all of our food without using pesticides, so we can be confident knowing the canned food we’re eating is safe from potentially-harmful chemicals.
Canning is eco-friendly.
By preserving your own food, you don’t have to rely on food that has been shipped thousands of miles to your local grocer, guzzling loads of gas along the way. Additionally, you don’t have to worry about throwing away extra plastic or aluminum packaging—by canning, you use only reusable materials, like glass jars, to store your food.
Canning is more flavorful.
Trust me… when you preserve your own food, it simply tastes better!
Are you convinced of the great benefits of preserving your own healthy food yet? I hope so!
To get started preserving your own healthy food, you’ll need these basic canning tools:
Basic Canning Equipment List:
There are lots of cool tools on the web, but below is a basic list of equipment needed for canning. When browsing items to purchase, I recommend going with stainless steel if you can afford it. Yes, the price is higher, but it lasts a lot longer than the alternatives, so your investment will pay for itself over time.
Water bath canner with wire basket
Water bath canners are made specifically for canning and come with a rack to hold the jars. The wire basket is key to successful canning by keeping the jar lifted away from the pot; if the glass jar sits directly on the bottom of the metal pot, it will get too hot and crack open.
Food with acid, sugar, or vinegar can be canned using the water bath method—like tomatoes, pickles, fruit, and hot peppers with vinegar, as well as jams and jellies.
Pressure canner
Pressure canners are a bit more expensive than water bath canners, but these are a must-have tool if you are planning to preserve foods with low acidity, like green beans, peas, corn, cabbage, potatoes, soups, meats, and broth. You can find some pressure canners that can play double duty as a water bath canner, as well.
Look for a pressure canner with a dial that shows the pressure and one that will operate on the type of stove you own. Some pressure canners are not recommended for ceramic (glass) cooktop stoves, so be sure the description matches your stove.
Blancher
Blanching your vegetables prior to freezing is a must to retain the flavor and texture of your veggies. The process involves briefly heating veggies to a very high temperature in boiling water, then quickly cooling them to stop the cooking process.
Blanching is very easy and you can use many types of pots to do so. I bought mine at a Tuesday Morning store at a discount. Mine is a large stainless steel spaghetti strainer combo that I bought at a Tuesday morning store at a discount. Although you don’t have to buy a strainer pot, it makes it a lot easier to drain the hot water off the blanched veggies. Some of these pot sets also have a steamer basket, which I use for steaming shredded zucchini.
Ball Canning Kit (including a funnel & jar lifter)
A ball canning kit comes with all the miscellaneous tools you need to successfully can, like canning tongs for easily lifting the mason jars out of the water, and funnels that let you pour your food into the jar without all the mess.
I like the ones that include a magnetized lid lifter, so you can easily lift the can lids out of the boiling water without risking burning yourself or dropping the lids.
These kits are relatively inexpensive, and can be found from a number of retailers online.
Canning jars, lids and rims
Commonly known as your classic mason jars, these come in a variety of different sizes. Find these just about anywhere—grocery store, hardware store, online, thrift store or garage sale… you name it, the world has plenty of canning jars to go around!
Be aware that canning jars have a life cycle and will start to chip and crack over time. If you are water bath canning, you do not have to worry about the life cycle because the jars do not get hot enough in that process to matter. But if you are pressure canning, be sure to only use jars that are no older than 3 years old, because the high pressure and extreme temperature can break your jars if they are aged.
I generally use Ball, Kerr, and Golden Harvest jars with success. I have tried other “off brand” canning jars and have not been satisfied with the results. Some of the jars won’t seal, the lid will be puckered, or it breaks in the pressure canning process.
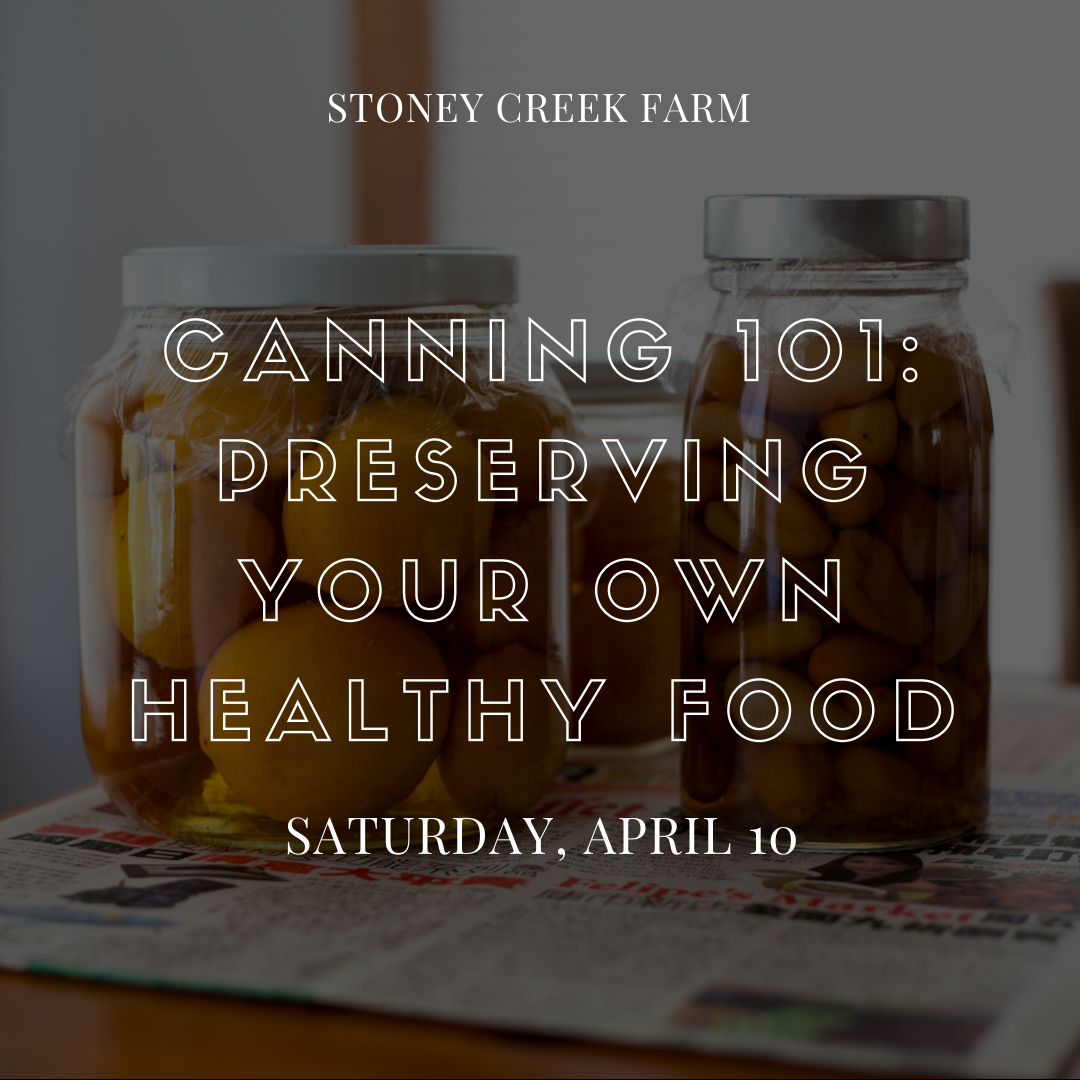
Canning 101 Class
If you’re local to Middle Tennessee, I invite you to join me on Saturday, April 10 for my popular Canning 101 Class, right here at Stoney Creek Farm.
I’ll show you the basic steps for:
- Pressure Canning
- Water bath canning
- Blanching
We’ll also discuss the processes for preserving jelly & jams, pickling, and drying herbs and fruit.
You’ll leave the class excited and prepared to stock your own pantry and freezer with your own homegrown, preserved food!
Leigh’s Homemade Chili Recipe
INGREDIENTS:
- 1 quart of crushed tomatoes (all the tastier if they are from your preserved collection!)
1 lb of lean ground beef - 1 can of chili beans
- 1-2 TB of cumin (to taste)
- 1-2 TB of chili powder (to taste)
- 1 tsp of minced garlic
- Salt to taste
DIRECTIONS:
- Brown ground beef and drain grease.
- Add all the other ingredients except salt. If this is your first time making the recipe only add 1 TB of cumin and chili powder—you can always add more.
- Bring to a boil and stir during the process, so it doesn’t stick to the pan.
- Taste and add salt.
- Simmer on low for 30 minutes to an hour.
I like to serve the chili over Jasmine Rice. Our family likes cornbread with it too, but you can use crackers or corn chips.
Enjoy!